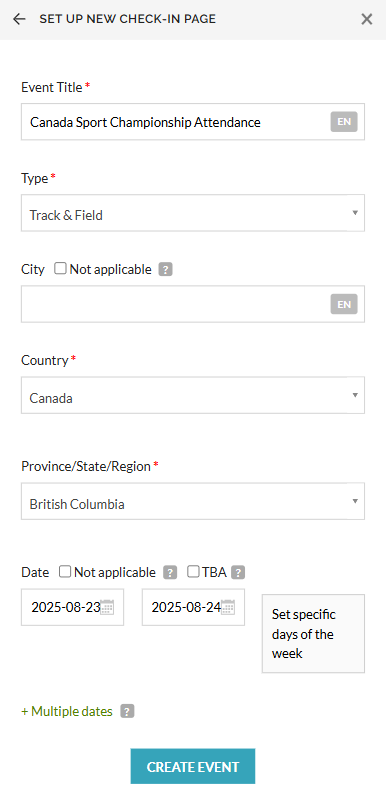
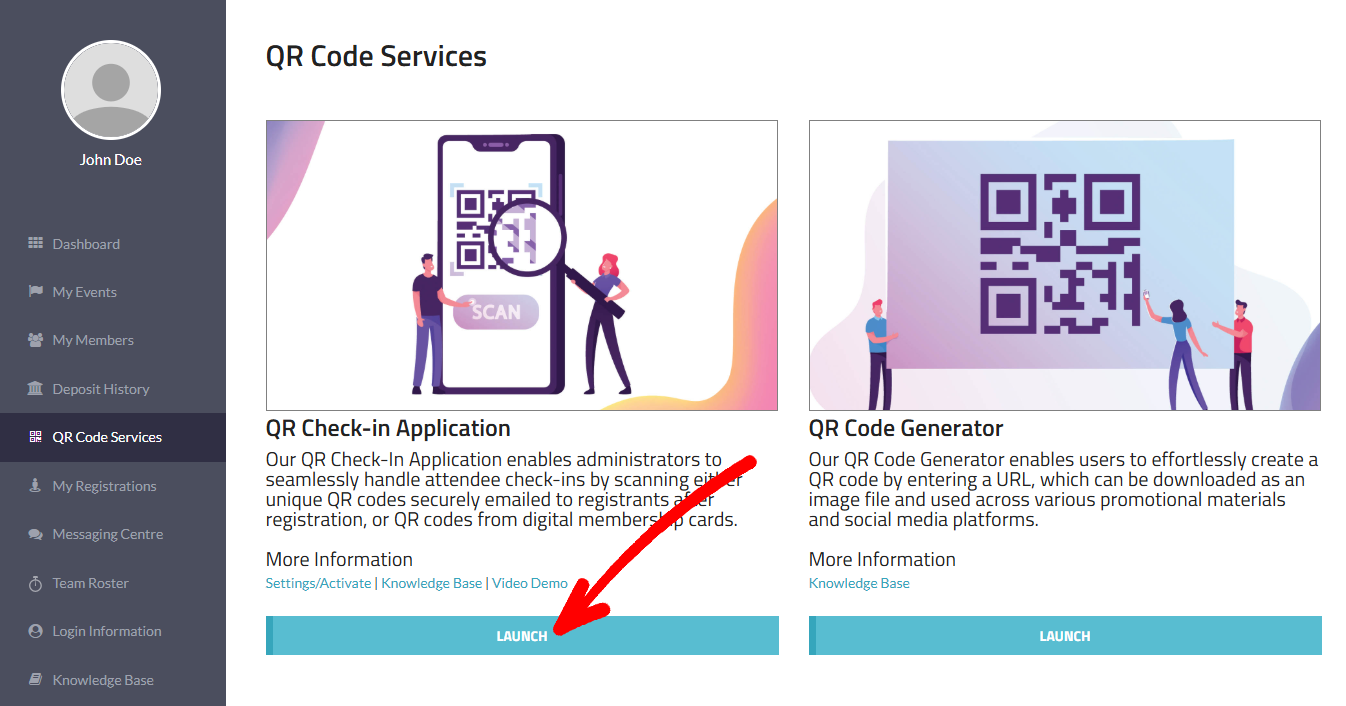
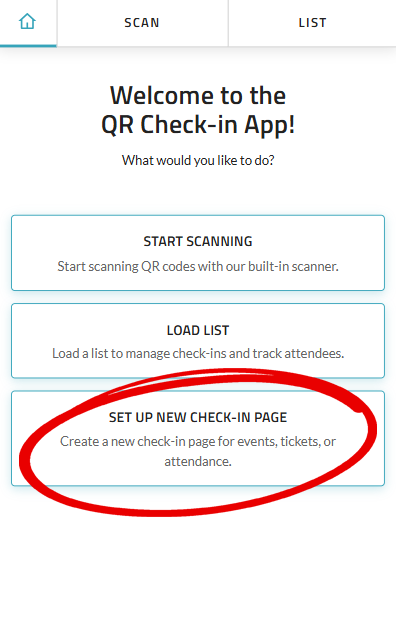
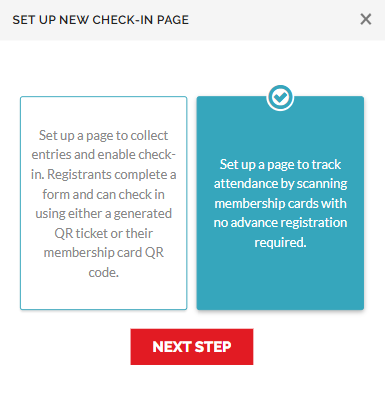
In the next popup, select one of your existing event/club pages to activate the check-in app on or create a new page completely. If you are creating a new page you will need to fill in all of the required fields before being brought to the Check-in App settings popup.
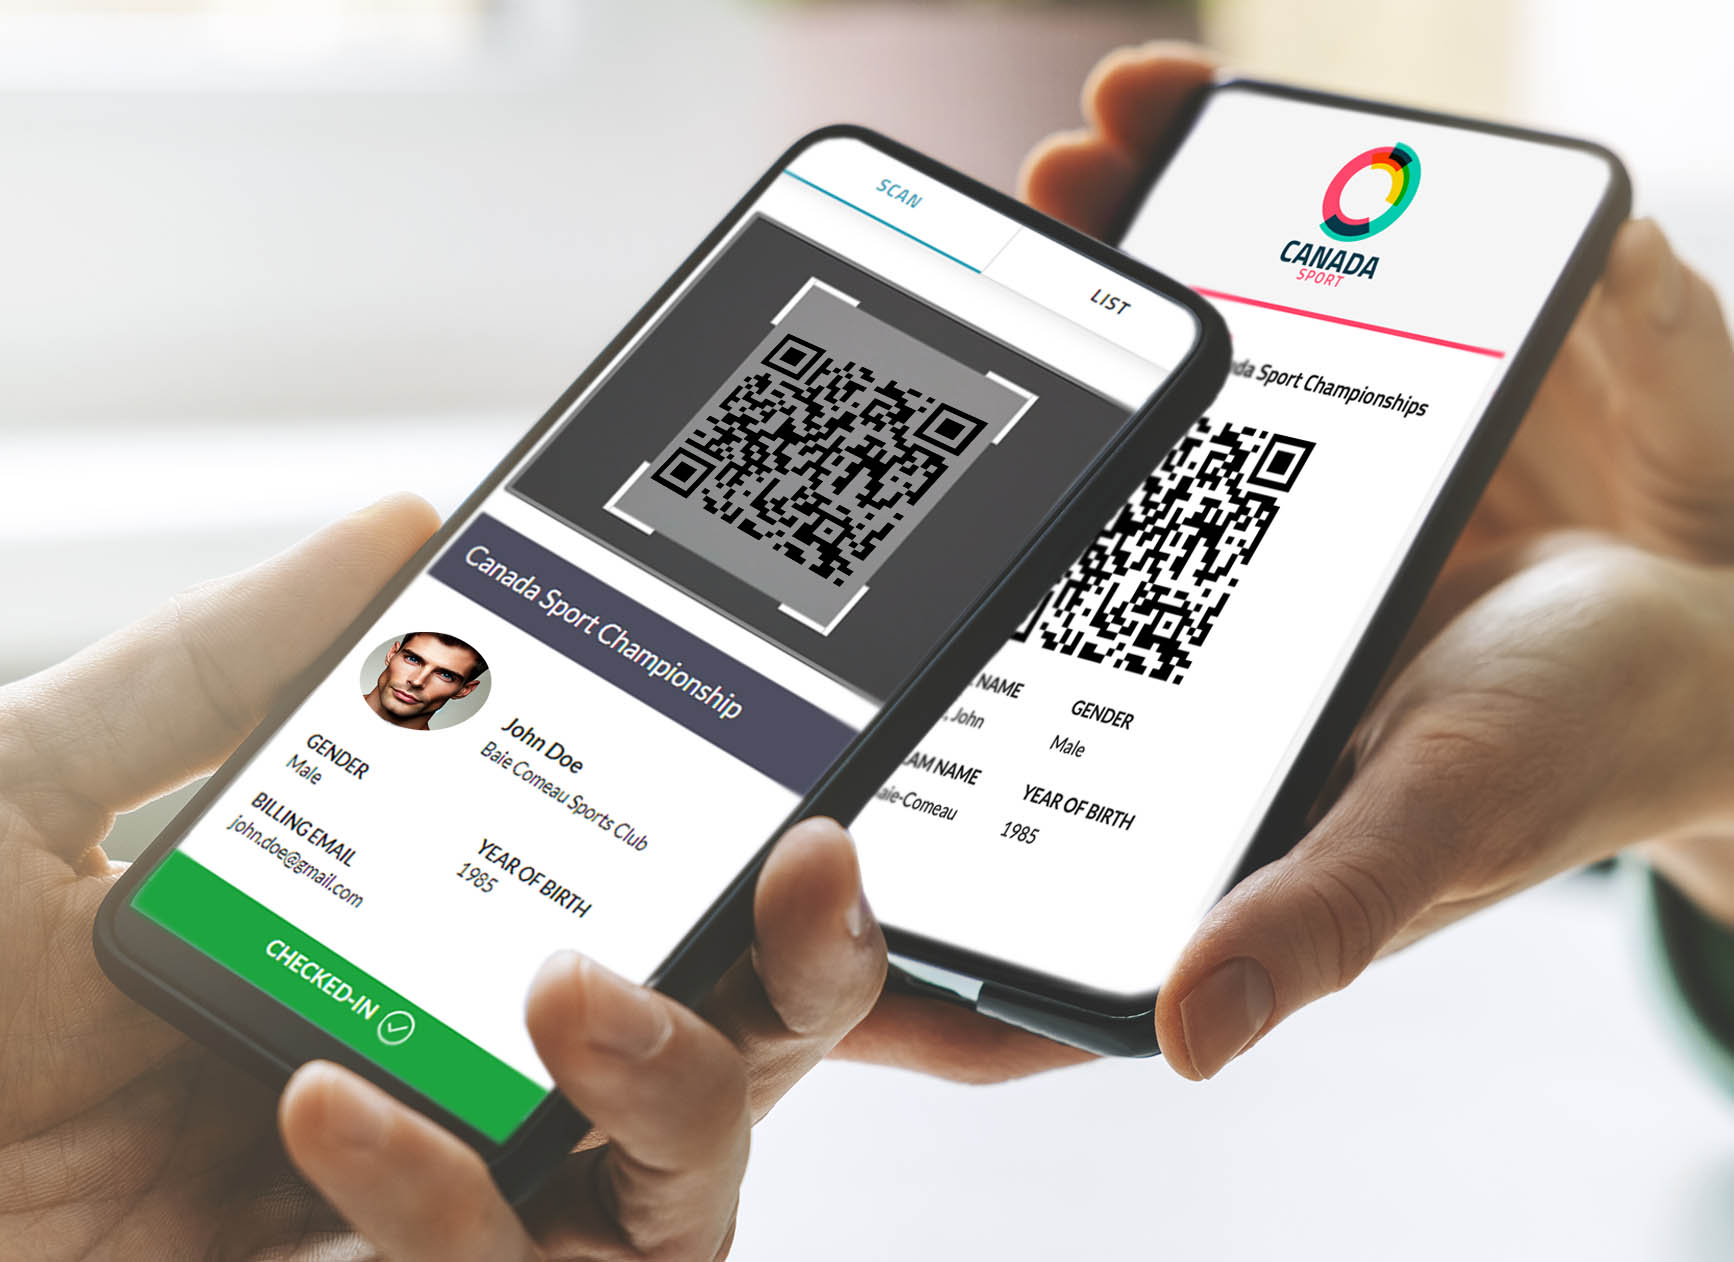
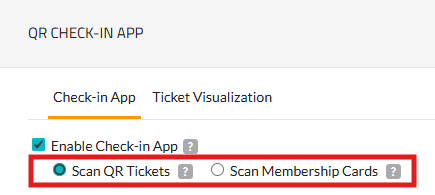
In the “Check-in App” tab, start by checking the box for “Enable Check-in App.” Once enabled, you’ll see two options appear: "Scan QR Tickets" and "Scan Membership Cards".
| (+) Learn more : Scan QR Tickets | |||
|---|---|---|---|

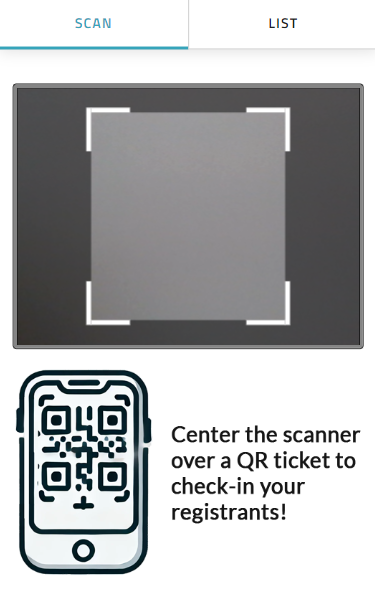
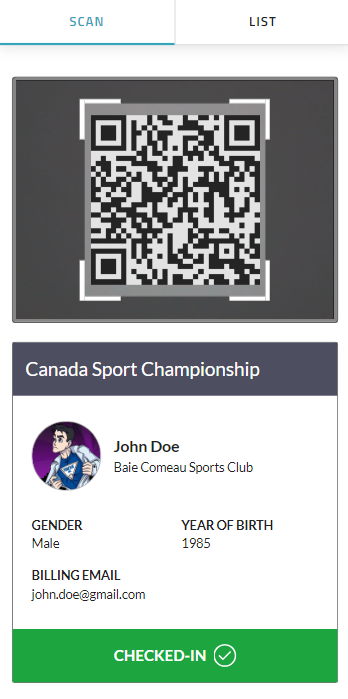
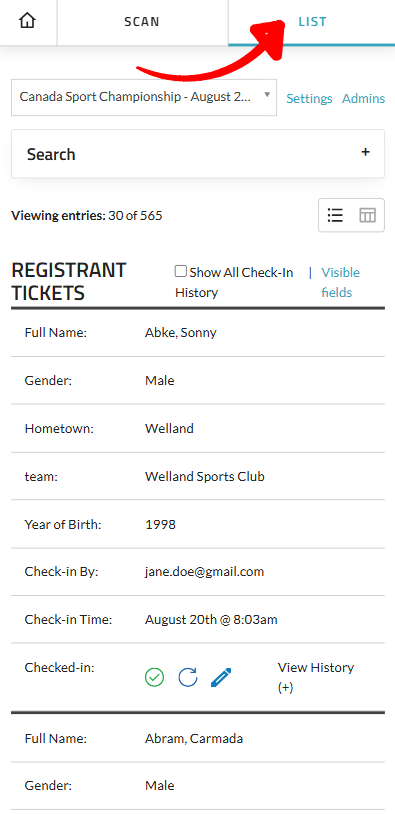
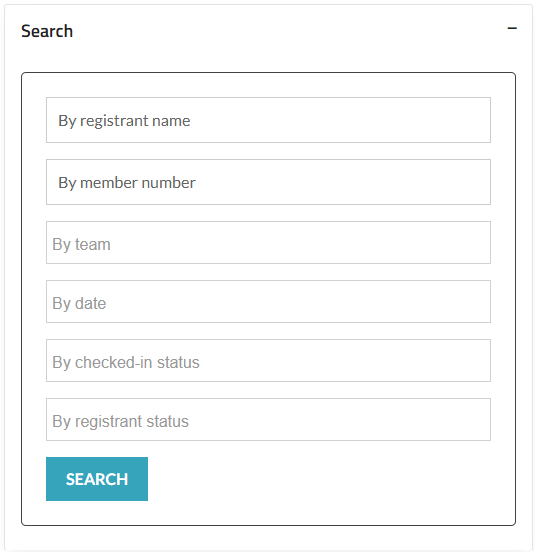
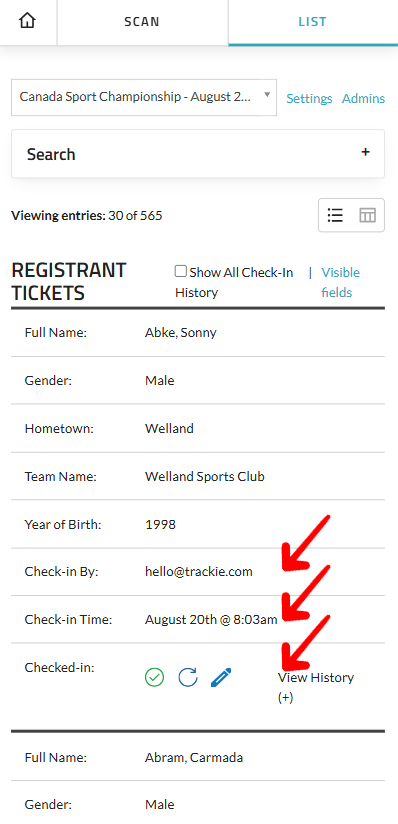
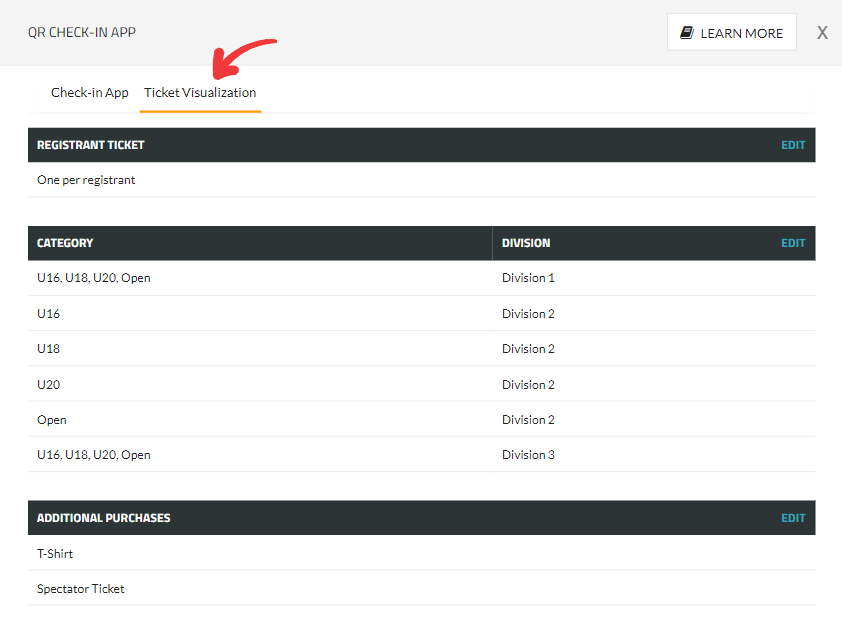
When you select "Scan QR Tickets," your event settings will determine which types of QR tickets you can generate – up to three options may be available: Ticket Types To confirm the tickets you will generate for your event you can use the “Ticket Visualization” tab. This tab allows you to preview the tickets that will be generated based on the options you have enabled in the previous tab. This tab is here to help eliminate confusion by providing a clear visualization of the ticket types and their respective details, making it easier to understand how registrants will receive their tickets. If the preview doesn’t meet your expectations, you can go back and adjust the settings accordingly to ensure the tickets are generated as desired. (+) Click here to learn more about Editing QR Tickets and Visible Fields. Finally, once you are satisfied with the settings, make sure to return to the “Check-in App” tab and click on the green “SUBMIT” button to save your changes. Important Note |

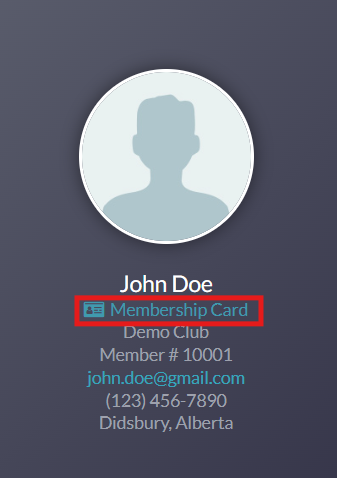
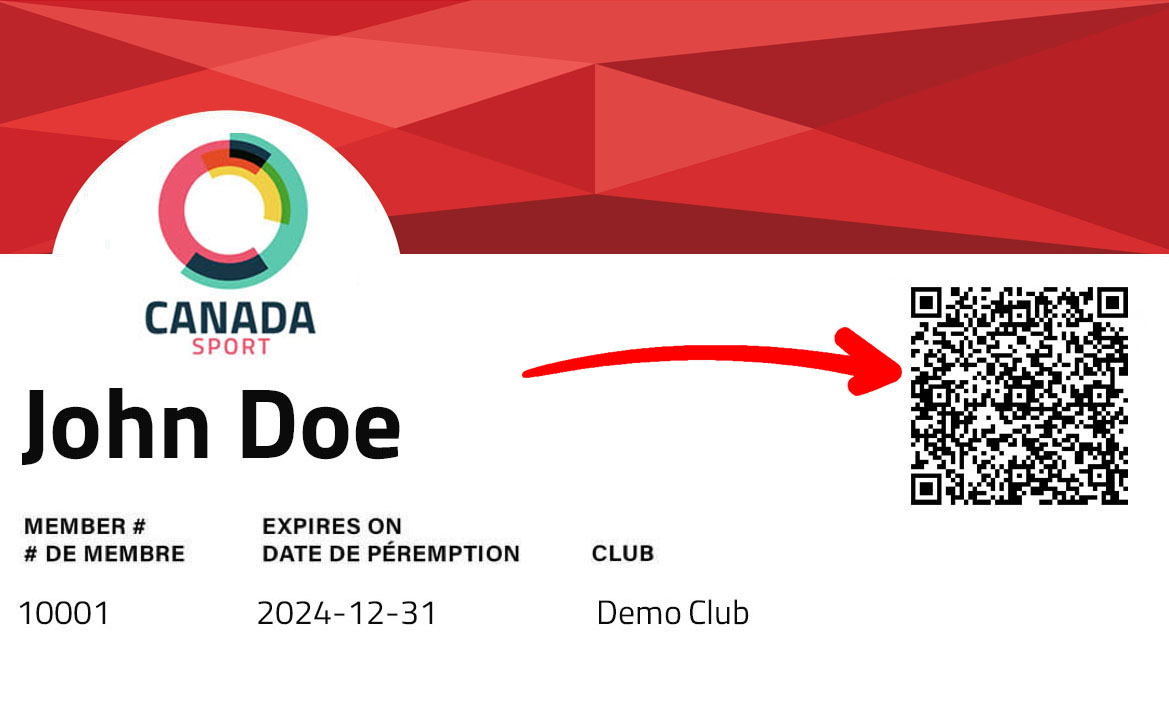
| (+) Learn more : Scan Membership Cards |
|---|
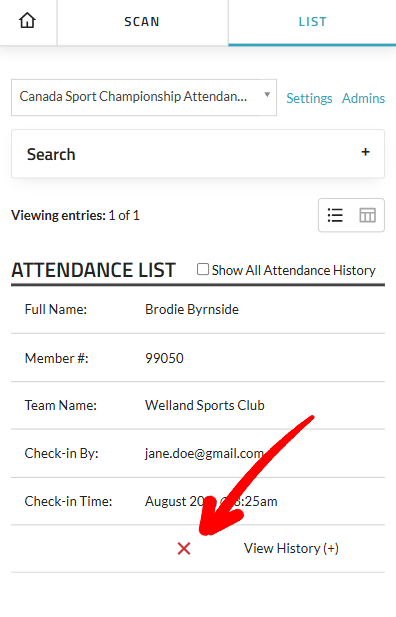
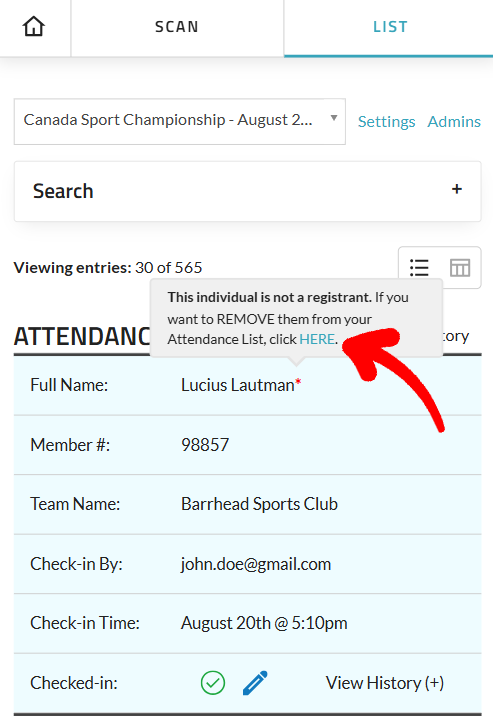
When you choose "Scan Membership Cards" you will have the option to “Allow non-registrants to be scanned-in” which can be useful for drop-ins or trial classes where pre-registration is optional, but you still want a record of who attended. 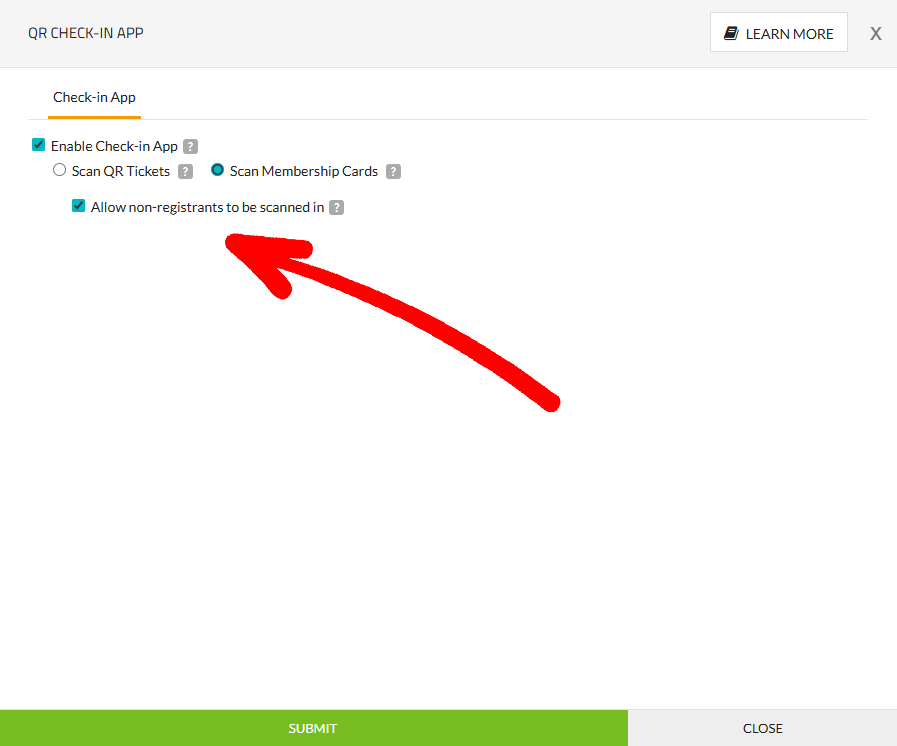
|